This DIY Pine Cone Ornament is cheap to make an turns out looking really unique.

With Halloween over and Christmas candy filling the shelves at the grocery store, it is almost impossible to not hear someone say “let’s wait til Thanksgiving’s over before we start celebrating Christmas.”
Honestly, I think I’m just as sick of that complaint as they are at seeing Christmas music start early. I say, why not start Christmas early?! People tend to be a little more jolly, and a little more giving, so why not?!
I made this DIY Pine Cone ornament as part of an ornament exchange. And the best part is that one of the requirements was for the ornaments to cost less than $10 to make.
I love doing crafts during the holidays, so I obviously HAD TO sign up for this!
I decided on this pine cone ornament and it wasn’t as hard as I thought it would be to make.
DIY Pine Cone Ornament Tutorial
Supplies:
- Styrofoam egg
- 1 sheet of holiday themed scrap-booking paper
- Straight pins
- Ribbon
- Scissors
- Dab of hot glue (optional)
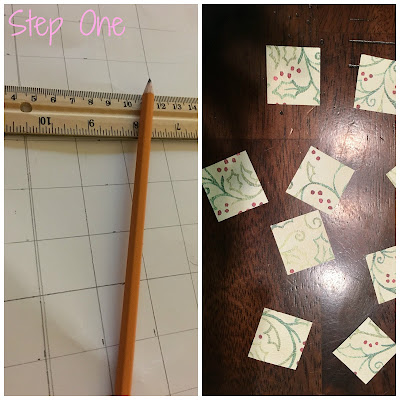
Turn your paper over. Measure & cut 1″ x 1″ squares. (You’ll only need about half your paper in squares)
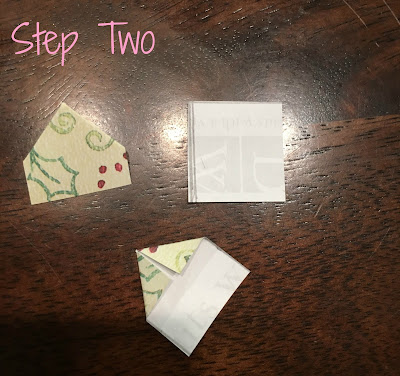
Fold top two corners down of each square to make a pentagon shape. Reserve 1 square as is for bottom of pine cone.
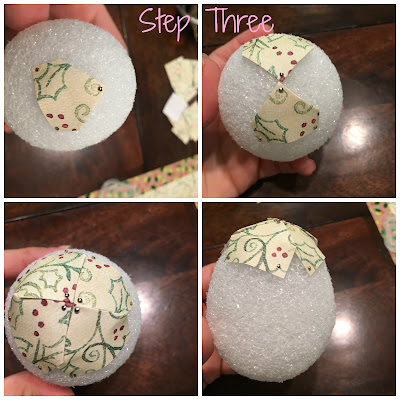
Find the narrow end of the egg, pin top point of pentagon to center and then place two more pins on either side. Repeat until top is covered with 4 pentagons. Then move to wider end and pin square paper using 4 pins to cover bottom (this part of step can also be done toward the end as well).
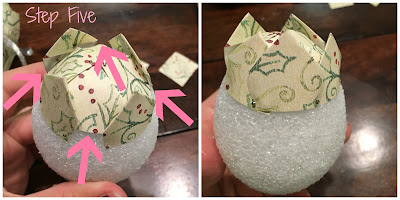
Beginning at narrow end, take a pentagon and hold about 1/4″ to 1/2″ down from previous row. Position it in between gap from two pentagons from previous row. Using two pins, pin in place (no longer pinning top point down, just one pin on either side). Repeat with 3 more pentagons until gaps from previous row are covered.
Take 4 more pentagons and fill gaps in current row. You will be doing a total of 8 pentagons per row in the same manner as above until completed.
When you get about 3/4 of the way down, it’s time to add the ribbon. Cut your ribbon long enough to hang your ornament. Give it a little extra length because you will start pinning it into place at this point. I cut mine about 11″ in length. Use two pins to pin in place. Continue pinning pentagons, occasionally covering ribbon as it comes up. As you get to the bottom there will be a lot of overlapping, that is fine. The pine cone is finished when you can see no more styrofoam.
(Optional): Place a dot of hot glue at bottom of pine cone and press either side of ribbon into it to secure into place.
Alright, so there you have it! A very simple yet impressive looking handmade ornament! I hope you enjoy this as well!! Happy Holidays!


Leave a Reply